Showing posts with label baking. Show all posts

Thursday, January 5, 2012

Good News

You know how when the sun comes out in the middle of winter it's like you've never seen it before? Even if it was out the day before? (But especially if like here in Seattle it was raining cats and dogs?) 


You know also, how when you actually get to go outside and let your totally bundled up self absorb some of that sunlight it makes you feel really warm and happy and want to skip around in a meadow somewhere.

Yeah me neither. Not at all.


Recently I made muffins that pretty much served to encapsulate that breath of sun in a slightly sweetened fluffy goodness. They had apricots. Lots and lots of them. Frozen at the peak of summer but then folded into a muffin batter hearty enough to sustain you on even the coldest winter day.


The bad news about these muffins is that you probably don't have several gallon sized freezer bags full of apricots with which to make them over and over, like I have. The good news about them is that you really could use just about any type of fruit in them. They could have frozen berries, or peeled and chopped apples or pears, or even frozen peaches.

Oh, I thought of some more good news about these muffins. They are pretty healthy, since they're whole wheat and oat and have a whole mess of protein rich ingredients alongside that pile of fruit.  They are a great breakfast or snack for this time of year, when most people are trying to eat a little bit lighter. Even more good news is that they are great slathered in butter, in case eating light isn't a priority.


Sun is Shining Good News Muffins
makes 12 regular sized little cups of joy

1 cup whole wheat flour
1/2 cup oat flour
1/2 cup garbanzo bean flour
1/4 cup ground flax
1/2 cup bran flakes
1/2 cup sugar
1/2 tsp salt
1 Tbsp baking powder
1 1/2 cup milk
1/4 cup plain yogurt (I like to use greek, it's tangy!)
2 large eggs
1/2 cup chopped almonds
1 1/2 cups frozen berries or chopped fruit, loosely measured


Preheat your oven to 500°F. This will make the muffins rise up a lot and have a nice domed top. Don't worry, you're going to turn it down when you actually put the muffins in. 
Beat the liquid ingredients together until well combined, then add the bran flakes and stir till they're mixed in all the way. Let it sit while you whisk together the dry ingredients and prepare your muffin tin. 

Whisk together all the dry ingredients, including the flax, in a large bowl. Then add the fruit and nuts and stir around to coat all the pieces in flour. This helps to keep them all from sinking to the bottom when the muffins bake.

Pour wet ingredients into dry ingredients, and combine just until you don't see any large streaks of flour left. It's ok if the batter doesn't look completely smooth.

Fill the cups of your tin about three-quarters full, maybe a little more. Place muffins in the oven and immediately drop temperature to 400°F. Bake for 15 to 20 minutes, or until muffins test done with a toothpick.


Friday, December 16, 2011

The Results Are In: Marx Foods Capricious Chocolate Challenge

Update: The polls are now open at Marx Foods, so be sure and stop by to put your vote in for my Chocolate Trio!


A couple of weeks can fly by so fast when you aren't looking. Weeks filled with playdates, family holiday parties, Drs appointments and colds.


They've also been filled with testing. I was selected to participate in a contest Marx Foods was holding: to create an original recipe based on chocolate, using samples of ingredients supplied by them. I met the Marx Foods guys back at Will Bake For Food in November, and thought it would be fun to work on my recipe testing skills in a semi-high pressure format. What can I say, I do better under pressure. I did have a little trouble deciding what I wanted to make though, so could only narrow it down as far as 3 different recipes. Dear readers, you're in for a little bit of a ride, but it'll be worth it.


So, I've been busy testing out cookie batch after cookie batch. A little cookie made of humble ingredients that have been mixed up to be larger than the sum of their parts. A cookie that started out as one thing and quickly turned into something else, something better. I thought it would be pretty perfect to have a cookie recipe, since cookies are such a big thing this time of year. Am I right?


I also tested some créme brulées that ended up being pots de créme instead. And there's also one savory dish, in case you don't like dessert. (Who doesn't like dessert?) More about those later, as first comes first. And if you like any of these recipes (or just like me) you can click the Marx Foods banner at the bottom to vote for me once the voting process has started!


Without further ado, here it is:


Mexican Chocolate Tea Cookies
makes about 32 cookies


These cookies are based on a common Mexican Tea Cookie, but also are based on a regular old Chocolate Crackle. They were inspired by the chilies included in the samples I got as part of the contest. 


8 oz semisweet chocolate, chips are ok but the better the chocolate, the better the cookie
2 oz unsweetened chocolate
1 cup brown sugar
3 eggs
1/2 cup plus 2 Tbsp vegetable oil
1 tsp salt
1 tsp baking powder
2 tsp chili powder (I used freshly ground dried Puya chilies from Marx Foods)*
1 tsp ground cinnamon
4 oz toasted ground almonds
7 oz all purpose flour
4 oz mini chocolate chips


Sift the flour with the baking soda and salt and set aside.


In a double boiler, melt the chocolates. When completely melted, add in the spices and sugar and mix to combine. Add the oil and eggs all at once and mix thoroughly. Next add the almonds, stirring with kind of a smashing motion to make sure that any lumps are broken up. Lastly, add the flour mixture and stir just until you see no more streaks. Let the batter rest until it is cool to the touch, then mix in the mini chips, otherwise they'll melt.


Cover and chill for several hours in the refrigerator, at least 3. When you are ready to bake the cookies, preheat the oven to 350ºF, with racks in the lower and upper thirds.


Using a number 30 scoop, (or scooping about 1 1/2 Tbsp sized balls) portion the dough out, and place on a parchment lined tray. These cookies don't spread much, so you want them to be nice and flat on the bottom and rounded on top, which is best achieved using the scoop. Leave about 2" between each cookie.


Bake about 10 minutes, then rotate the pans, both top to bottom and spinning the pans front to back. Bake about 7 minutes more. They should be firm but not firm enough to lift off the pan while still hot. Let cool for about 5 minutes then remove to a cooling rack. Let cool completely before dusting with powdered sugar.


The rejects, which we gladly ate anyway


The best part about these cookies is that unlike a more traditional Mexican Tea Cookie, which are akin to a shortbread and must contain butter to taste good, these are parve (dairy free). If you keep kosher, that means that you can eat them as dessert following the main attraction:


Chocolate and Chili Braised Beef Short Ribs with Sweet Potato
serves about 6


The short ribs I used for this recipe are ones that came from the cow we bought back in summer. They were excellent, tender, flavorful and totally worth buying a freezer for. The sauce also goes great on the saffron roasted potatoes I served with the ribs. 


4 lbs 3" beef short ribs with plenty of meat on the bones


For the dry rub:
2 Tbsp ground Puya chilies*
1 Tbsp ground Chipotle pepper
2 Tbsp cocoa powder
1 Tbsp salt
10-12 grinds black pepper


For the braising liquid:
1 yellow onion, chopped
2 smallish sweet potatoes, cut into 1" rounds
4 cloves garlic
1/3 cup tomato paste
2 cups of your choice of broth (you might need more if your pan is bigger)
1 cup cold strong coffee
6 oz chocolate


Mix together the dry rub ingredients in a large bowl, and coat each piece of rib completely. Cover and refrigerate the ribs for several hours or overnight.


Heat a large (at least 5 qt) dutch oven with enough oil to just cover the bottom. Working in batches, brown each rib on all sides, taking care not to crowd the pieces so that they don't steam themselves. Remove the ribs to a clean plate as you go.


Once all the ribs are browned, add in the onions and cook till translucent and starting to get a little brown, then add the tomato paste and garlic. Stir it around the pan, cooking it until it starts to smell like tomatoes, then add the coffee, being sure to scrape up all the browned bits that loosed up when you add the liquid. (Use a wooden spoon or other tool that won't damage the surface of your dutch oven.) Add the sweet potatoes, and then the ribs, tucking everything in all together as best you can. Cover with stock and place in the bottom third of the oven. Cook about 2 hours, until the meat is tender. Remove the lid and cook another 1/2 hour more, letting the liquid reduce down.


Remove the pan from the oven and then remove the ribs, discarding any bones that fall slip out. Place the ribs in a bowl, and strain about 3/4 of the sweet potatoes and onions out of the broth. Let the broth rest for a few minutes and spoon off any excess fat that rises to the top. Add the meat back in, bring to a boil, then reduce the heat and let simmer on the stove for about another 1/2 hour, tasting for spice. When I tasted mine, I kept getting a hit of spice at the back of my throat that led me to believe that it would be pretty hot, but it wasn't as strongly flavoured as I feared once we were eating it with all the components together. In the last 15 minutes or so of cooking, add in the chocolate. Be sure and stir it up so the sauce reaches a nice smooth consistency, but then add back in some more of those sweet potatoes for a little bit of texture.


Serve immediately, with a little sour cream on the side to cool the heat, if you want it. (We used Sour Supreme)


Of course, if you're not worried about having a parve dessert after your dinner, you could always serve the next recipe instead. They started out as créme brulées, with the intention of using the coconut sugar to make the crust on top. Turns out, it was too moist and brown a sugar to work well and mostly just burned instead. Well, since the texture of the pudding itself had been closer to a pot de créme anyway, I just went down that road.  


The original créme brulées


Fennel & Chocolate Pots de Créme
makes 6-8


1 1/4 cup heavy cream
1 1/4 cup half & half
7 egg yolks
4 Tbsp coconut sugar*
2 Tbsp granulated sugar
1 vanilla bean, split and seeds removed*
6 oz good quality dark chocolate, chopped
1 Tbsp fennel seeds
2 tsp fennel pollen*


Preheat oven to 300ºF


In a medium sized, heavy bottomed pot, toast the fennel seeds until they are fragrant and starting to brown, just a couple of minutes. You'll want to watch them carefully as they will burn easily. Using a wooden spoon, crush the seeds up a bit. Next, add the fennel pollen, vanilla bean, cream and half & half and heat until it almost reaches a boil. Turn off heat and add chocolate. Let this mixture steep for 15 minutes or so, until you can smell the fennel just the faintest little bit. If it smells stronger sooner, continue with the next steps.


While the chocolate mixture steeps, combine the sugars and the egg yolks in a large metal bowl.


Next, bring the chocolate mixture back to a simmer while stirring continuously (do not boil, or you risk burning the chocolate). Strain this mixture into the eggs yolks, and then whisk until fully combined. Pour into 6 small cups or ramekins, each at least 6 oz. You could also use smaller dishes and make more servings, as it's a rich dish for some palates.


Cover each dish with foil and place in a high sided roasting pan. Place the pan in the oven on the middle rack and pour enough water into the pan to reach 1/2 way up the sides of the dishes. Bake for 30 minutes and check for doneness. Mine needed just about 7 more minutes after that. The crémes will be set around the edges but just barely so in the middle. Cool completely, and sprinkle just a pinch of coconut sugar over each one before serving, it lends a nice little crunch.


* These ingredients are the ones that were supplied to me by Marx Foods as part of the contest.

Opening the Window

I'm not usually susceptible to winter time blues, but I have been in a funk this week for sure. I'll spare you the details, but suffice it to say that a lack of sleep has had something to do with it, as well as it being cold but refusing to snow.


Yesterday though, I got determined to get myself out of that mood. You know how they say that sometimes it has to get worse before it can get better. Yeah, that's pretty much true. I had to miss not one but two events that I had planned on attending yesterday evening and it made for a sort of wretched early evening thinking about the fun and friends I was missing. After a dinner of ravioli in brown butter sauce made by Joe and a roasted veggie jumble made by me, he and I decided to watch a movie (after, of course, doing a ridiculous number of sit-ups) and eat popcorn. 


This was a most excellent choice. Excellent as in we watched Bill and Ted's Excellent Adventure, which was totally perfect. It was nice to laugh as something you're supposed to laugh at for a change. Not to mention eat a dessert that wasn't chocolate...but that's another story.


Anyway, I was going to make turnovers last night for breakfast this morning, but then decided that no, I would get up nice and early and make them instead. And then instead of making turnovers it morphed into a jalousie.


I haven't made a jalousie probably since pastry school. Which is a shame because they are incredibly easy and incredibly delicious. I sense a lot of puff pastry in my near future. Maybe I'll even make the dough next time around.


So once I got tired of a toddler clambering over me in bed this morning I left her with her papa and came down to brew coffee and turn the oven on nice and hot. It was still just almost too dark to even realize it was morning, unless you were looking for less obvious signs. 


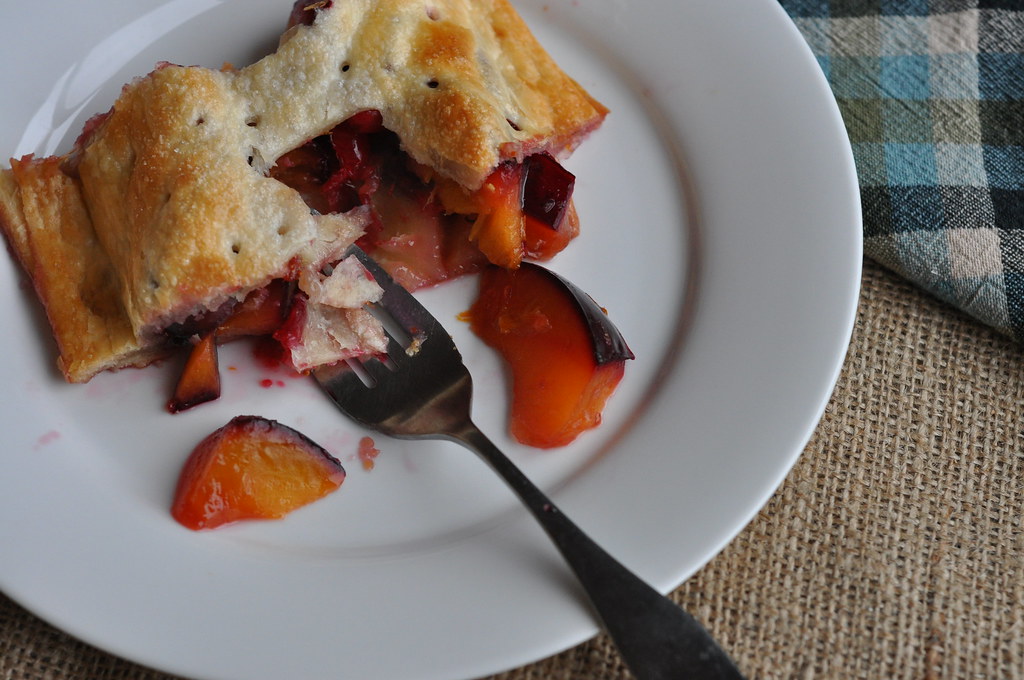
But I soldiered on and ended up with a breakfast that most people could never eat on a Friday morning unless they were on vacation. I had the last of this years fresh pluots in the fridge, waiting for a dish worthy of them, and also a handful of fresh cranberries. It might not sound like much, but it ended up being spectacular.


Plum and Cranberry Jalousie with Fresh Ginger
Makes 4 servings


A jalousie is a window shutter, the kind with horizontal slats. This pastry resembles it when finished, and if made properly will also give you a new outlook on life, almost as if you were opening a window on a brightly lit morning.


One sheet frozen puff pastry
3-4 smallish plums or pluots
1/4 cup fresh cranberries, cut in half
zest from 1/2 an orange
1 tsp freshly grated ginger
1/4 tsp or so freshly grated nutmeg
1 Tbsp of sugar, more if your plums aren't very sweet
Whole milk, cream or half & half for glazing


Preheat the oven to 400ºF


On a parchment lined baking sheet, place the puff pastry. It will thaw while you prepare the filling, especially if you leave it by the oven. You want to cut the sheet in half, but not quite in half. Also not in thirds. The bigger half needs to be about 1" wider than the narrower half. This wider half will become the top of the pastry. Set it aside on another sheet of parchment.


While the pastry thaws, prepare the fruit. Wash and slice the plums, each one in 8 or 10 wedges. Halve the cranberries and add to the bowl with the plums. Add all the other ingredients and toss to coat until the sugar starts to break down in the juices from the plums. Let rest until the dough is completely thawed, so the flavors can marry.


Pile up the fruit in the middle of the bottom half of puff pastry, being sure to leave at least 1/2" all the way around for sealing the top half on. Before placing the top half on, cut about 8 slits, each an inch apart but 1 1/2" from the ends, in the dough. The slits should be about 2" long. (This is a step I forgot...do as I say and not as I do,  I guess?) Using a pastry brush, lightly dampen the bottom pastry around the edges and then place the top on. You may need to stretch the dough a bit to match up the edges. Using a fork or a chopstick, press the two halves of dough together, sealing completely. Brush the entire pastry very lightly with the milk, then sprinkle just the littlest bit of sugar on top.


Bake for about 1/2 hour, rotating once to brown evenly (if you can remember...it proved too early for me to follow my own directions).


Let rest for about 5 minutes and slice, pouring a little bit of milk or cream over if you desire a little hint of creaminess.

Monday, December 5, 2011

Wild Beasts

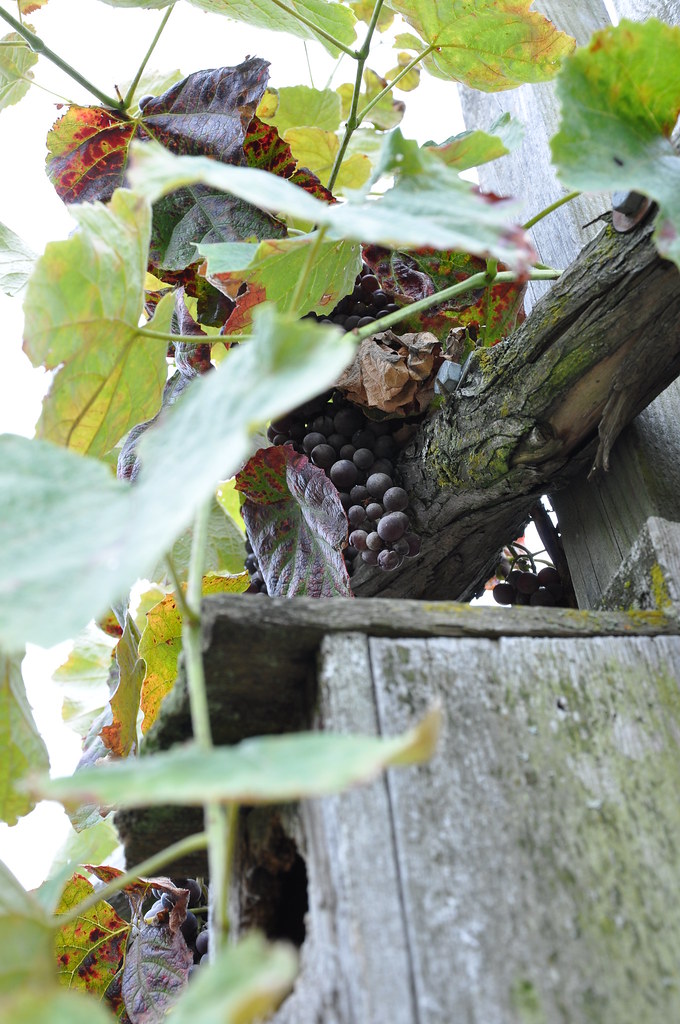
I recently took on a project that I've been meaning to do for a while and I've been putting off and putting off, mostly because it's kind of high maintenance and I'm kind of a low maintenance type of girl. The project was to grow a wild yeast culture using the organic grapes that grow in our P-patch. 


This year the grapes were ripe right before we were due to go out of town for a week, so I picked them and then froze them, hoping that it would still work but setting my expectations fairly low in case it didn't. I figured with that handicap and the fact that our house is almost as cold as it is outside, I wasn't sure any yeast could survive, let alone thrive.


The starter in it's early home, by the oven.

I'm using the method from Nancy Silverton's Breads from La Brea Bakery. I was given a copy of this book as a wedding gift (I think?) and haven't had a chance to use it at all since every recipe in the book calls for a starter of some sort that I just didn't have the time to set up until now. The recipes in the book are fairly technical, so it's not the best book for beginning bakers, but since I've baked a bit before I feel comfortable with the way she talks about the bread. I take it all with a gain of salt because she's way way more into bread baking than me, but even us amateurs like a good loaf now and then. She does a very good job explaining all the steps and giving tips for how to do each part of the bread making process. 


So I went ahead with all the steps. It wasn't too complicated, just sort of messy and delicate, also requiring a heaping helping of patience. The process takes about 2 weeks, from the day you crush your grapes to the day you bake you first loaf.


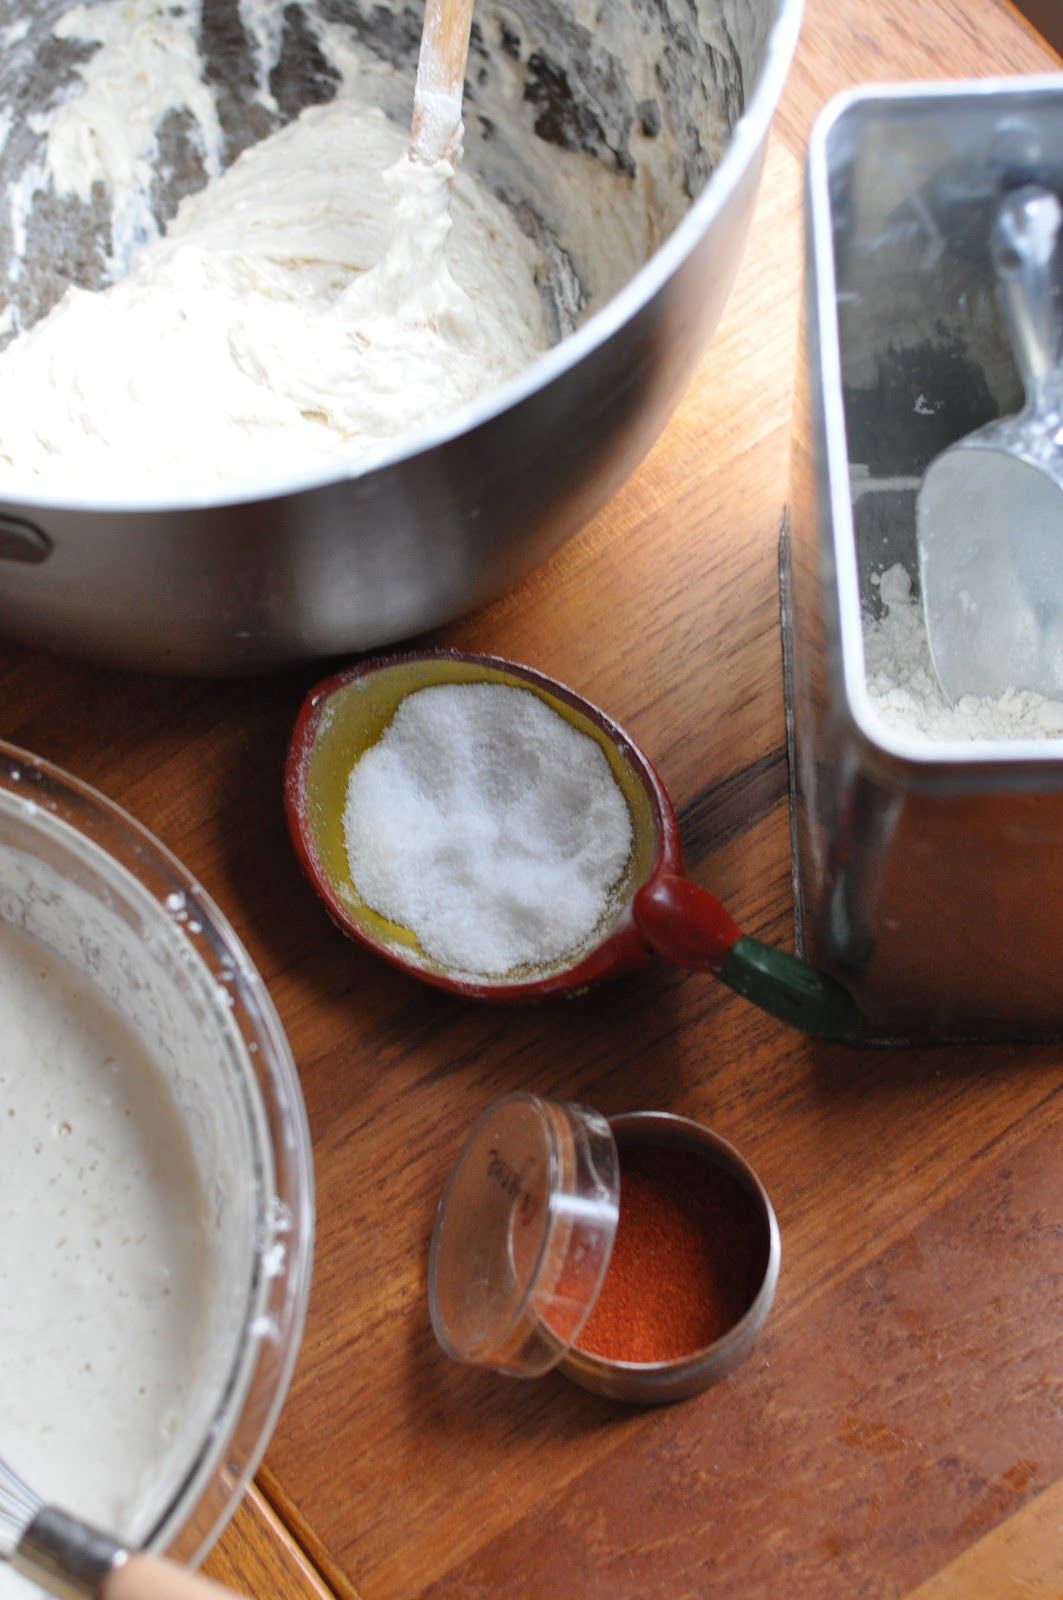
The first 9 days were simple. You make a mixture of flour and water, crush the grapes and add them, all secured in a clean airtight container. You check it every day, but you don't have to do anything else very often. 


After those first 9 days is when it gets a little more time consuming. You have to feed the mixture 3 times a day--breakfast, lunch and dinner--with a rigid schedule of how long the bread can go without being fed. And you have to dump out a ton of mixture and start over with just a little over a pound every morning. This was the part I had the hardest time with. It's not in my nature to throw away pounds and pounds of perfectly good flour. One, we're pretty frugal around here, and two, I'm a pastry chef. Food waste is a huge sin in professional kitchens. 


So I set out on a mission to use up as much of that dang starter as I could. I also tried to give a lot of it away, by offering starter batches to friends and people in our farm co-op. I think I ended up giving away 4 batches, and using the starter in an equal number of unexpected projects in the kitchen. 


I made lots of cracker dough to freeze for entertaining over the holidays, with cayenne and olive oil. I used some to make sourdough waffles with apple cider. Eating those was like a little preview of heaven for foodies. And I made crumpets. Dozens of crumpets, two days in a row. Some of which we ate and the rest of which maxed out what was left of our freezer space. 


I can't share the recipe for any of these things, since I made them all up on the fly. I guess my baking and cooking knowhow came in handy here, because I was able to just add enough of ingredients X, Y, and Z to make stuff work. 


What I can share is a very simple recipe for a salad. On Friday after making crumpets for what seemed like hours, we used them as our "challah" for a Shabbat dinner with our friend Aviva. Dinner ended up being sort of rushed, as she needed to be at the airport at 6:30, but it was still good to see a friend and share a meal, and to be able to enjoy some of the fruits of my hard work in the days leading up our meal. 


The salad had endive, warm roasted beets and goat cheese and a dijon vinaigrette. That's it, the entire recipe. Really. I think it would be equally good with some butter lettuce or blue cheese. And I suppose you could really use any vinaigrette that you like. Whatever you have lying around really. The secret is that the beets should still be warm, so the cheese and the dressing really meld all together. That's what made it so fantastic.


I did finally get around to actually baking some real bread on Saturday--a rustic white bread, which I shaped into rolls for dipping in the minestrone I made that night. (More crust is totally better, right?) The bread was great. It rose slowly but had great oven spring, so I know my yeast is happy and healthy. Onto real challah this Friday!


Easy Dijon Vinaigrette
makes about 1 cup


1/4 cup extra virgin olive oil
1/4 cup balsamic vinegar
1/4 cup champagne vinegar
1 Tbsp or so sugar, honey or my favorite, pomegranate molasses
1 Tbsp good dijon mustard
1-2 cloves crushed garlic
salt and pepper to taste


Shake all the ingredients in a jar, adding more mustard if necessary to achieve a very smooth, emulsified texture. Taste for acidity and add more sweet if you like. I tend to like my pretty acidic and low on the oil. Keeps in the fridge for 2 weeks.

Friday, December 2, 2011

The Goodies

Recently I decided that my plate wasn't quite full enough and that I should take up a new hobby. One that people get obsessive over and do for ever and ever and love.


Knitting.


Yeah, I know. It's kinda cliche and all that, but honestly, I have this little cutie who totally deserves to have all kinds of awesome things knitted for her, but not too many people to knit them but me. Things like this. Or this totally awesome berry pie hat, which by coincidence was just gifted to Lilli the same day as knitting club, a late birthday present from our friend Meghan.


The knitting club I joined is pretty low pressure if you can ignore the fact that we usually refer to it as a cult. It's with people I was already well acquainted with, so I knew I would fit right in and be comfortable getting help. So far I've been to just 2 meetings, but there's only been 3 since this group even started, so I'm off to a good start with the socializing part. The knitting part is going to take some time. At this Wednesday's circle I discovered that I was actually knitting totally wrong but somehow came out with the right result. What can I say? I've got skills.


Last week there was some delicious white chocolate covered popcorn with cranberries that I ate way too much of. Especially considering that I was eating caramel corn every day. And the fact that it was covered in sticky melty white chocolate. Not exactly the best thing to have coating your fingers when you are trying to use them to hold onto yarn and knitting needles, but that did not stop me from eating too much anyway. There was also some ginger cookies made by the friend who started the group, and they too were addicting.


It's a good thing I finally started that sit-up challenge this week, because I have been eating too much.


Anyhow, for this weeks meeting I decided that I should make a treat, since that's what I do best. To get into the spirit of the season (most everybody else's season, that is) I made delicious brownies. With, you guessed it, candy canes. 


Normally my go to brownie recipe is the one from the cookbook put together by the founders of Chocolate Bar in New York, but I wanted to make a double batch and that would have required more eggs than I was willing to spare (eggs are in short supply around here lately, as most of the chickens are molting so they aren't laying much).


I did a little searching and ended up basing them off of a recipe from the book Bittersweet instead. They are pretty much the perfect brownie, even without the addition of candy canes. If you like your brownies fudgy but not too moist or sticky, these ones are right on target, with an ever so slightly crackly crust and the right amount of chew.


I made them with Hershey's Special Dark Cocoa which I purchased out of curiosity. It's responsible for the deep rich black color of the brownies, which I absolutely love. Somehow it just makes them taste better knowing that they look like a galaxy of candy cane stars.


In the end, I had to pull apart my scarf about 3 times over the course of the evening. One time for each brownie I ate. Oh well, at least I'm good at baking.


Peppermint Galaxy Brownies
adapted from the book Bittersweet by Alice Medrich
makes 16 roughly 2"square brownies, easily doubles


10 Tbsp unsalted butter
1 cup sugar (original recipe calls for 1 1/4 cups)
3/4 cup plus 2 Tbsp unsweetened cocoa powder, any type is fine but I used this
1/4 tsp salt
1/2 tsp vanilla extract
2 large eggs
1/2 cup all purpose flour
1/2 cup crushed peppermint candy canes, plus extra for the top


Preheat oven to 325ºF, with a rack in the lower third of the oven. Line an 8" square baking pan with parchment paper, letting it overhang on 2 opposite edges.


In a saucepan over medium heat, melt the butter without browning. Remove from the heat and add the sugar and salt and stir until well combined. Add the cocoa powder and vanilla and combine till it forms a thick paste. Add the eggs one at a time, and beat with a wooden spoon or a spatula after each addition. Add the flour and stir until you don't see any streaks of flour, then beat for an additional 40 strokes. About 20 strokes in add the crushed candy canes, and finish combining. 


Spread batter in pan. Sprinkle on some more candy canes, as many as you like. Don't go too heavy--you want there to be a balance of chocolate and peppermint. Bake about 20-25 minutes, until a toothpick inserted in the center comes out with some batter stuck to it, but not totally glopped on. 


Cool completely on a wire rack. Use the edges of the parchment paper to remove from the pan. Cut with a sharp knife, wiping clean on a damp rag before eat cut.